FaceTime app is a useful tool to connect with your family and friends. Encountering issues such as FaceTime not working can be frustrating. And many people also face the problem of iOS 17 FaceTime photos not saving. Have you ever experienced that the FaceTime app says it has been saved but the photo doesn’t show up anywhere? Don’t worry, we’ve got you covered. Our guide is here to help you troubleshoot the issue and ensure your precious memories are safely stored. Let’s begin and keep those special moments for you.

- Part 1. Why Are My FaceTime Photos Not Saving?
- Part 2. Basic Fixes to FaceTime Photos Not Saving
- Fix 1: Enable FaceTime Live Photos
- Fix 2: Ensure Enough Storage Space
- Fix 3: Remove Privacy Restrictions
- Fix 4: Check the Network Connection
- Fix 5: Disable and Enable iCloud Photos
- Fix 6: Restart the FaceTime App and the Device
- Fix 7: Reinstall the FaceTime App
- Fix 8: Check Software Update
- Fix 9: Reset the Device [Data Loss]
- Part 3. Advanced Fix with A Professional Tool without Data Loss [Effective]
- Part 4. Conclusion
Part 1. Why Are My FaceTime Photos Not Saving?
Many possible factors cause the problem of FaceTime live photos not saving. By identifying them, you can try to determine which factor is causing the problem on your own and effectively troubleshoot the issue.
1. Privacy Restrictions: Incorrect settings can prevent photos from saving successfully. Not only you but also the person you are calling needs to modify the settings as it relates to privacy.
2. Insufficient Storage Space: When your device runs out of storage space, you can’t save photos from the FaceTime app. Clean up unwanted files, apps, and data to free up the space for your device, or you can use iCloud service.
3. Unstable Network Connection: Almost every app can’t run smoothly without a good network. That’s why you need to ensure a stable network connection.
4. iOS System Issues: Various system issues within iOS can affect the functionality of FaceTime. Sometimes it's because of an outdated iOS version, and sometimes it could be deeper system glitches.
Part 2. Basic Fixes to FaceTime Photos Not Saving
Since we know the possible reasons to FaceTime photos not saving, let's go through them one by one by implementing the solutions below.
Fix 1: Enable FaceTime Live Photos
Enabling FaceTime Live Photos allows you to capture moments during video calls and save them to your device. Both you and the other person have to enable this feature, or you can’t save live photos because of the privacy policy.

- Step 1: Go to Settings, and scroll down the screen to find FaceTime.
- Step 2: Turn on Facetime Live Photos.
Fix 2: Ensure Enough Storage Space
Checking and managing your device’s storage space is essential. If there isn’t available space, you can try to transfer your data to your computer. Besides that, iCloud service is also a good choice, with which you can store your photos in iCloud instead of your iPhone’s storage.
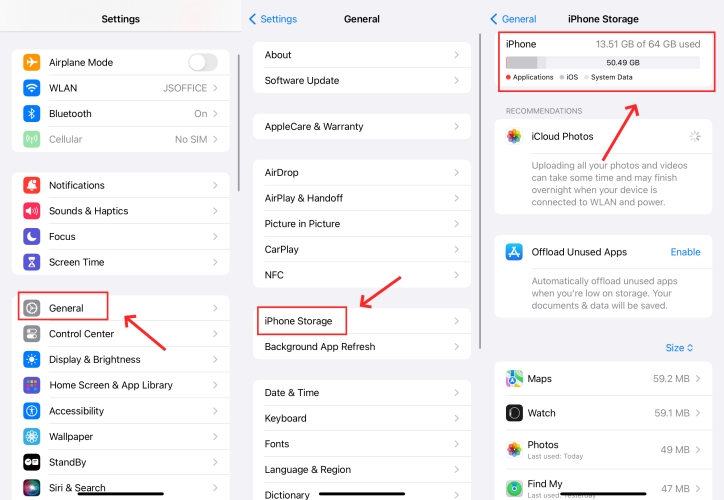
Steps: Go to Settings → General → iPhone Storage, and then you can see a detailed situation of your iPhone storage.
Fix 3: Remove Privacy Restrictions
While the default settings are enabled in most cases, there are exceptions. Follow the steps below to check if there is a privacy restriction, and if so, remove it.

- Step 1: Go to Settings → Screen Time.
- Step 2: Scroll down the screen to find Content & Privacy Restrictions, and tap on it.
- Step 3: Tap Allowed Apps, and make sure the FaceTime and Camera are both enabled.
Fix 4: Check the Network Connection
We all know the importance of a stable network connection. You can use stable Wi-fi or use 5G cellular. If still nothing works, you can try to reset network settings.
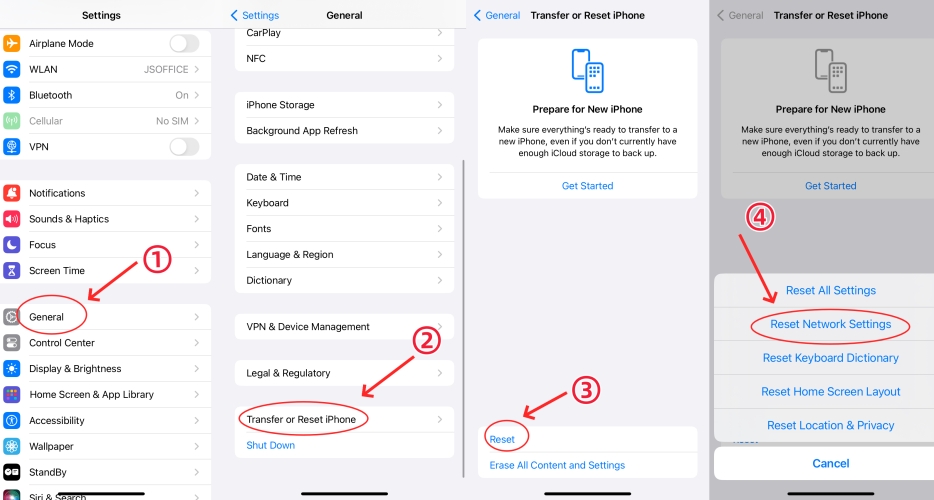
Steps: Go to Settings → General → Transfer or Reset iPhone → Reset → Reset Network Settings.
Fix 5: Disable and Enable iCloud Photos
This way is especially essential for those who don’t have enough iPhone storage and get iCloud service. Because their photos may have been stored in iCloud, and the sync process went wrong. This way can simply restore the iCloud Photos.

- Step 1: Go to Settings → Photos.
- Step 2: Find iCloud Photos.
- Step 3: Toggle off iCloud Photos. Wait for about 1 minute and turn it on again.
Fix 6: Restart the FaceTime App and the Device
Restarting is a quick and easy fix to address most temporary glitches that may be preventing photos from saving.
· 6.1 Restart the FaceTime App

- Step 1: Go to Settings → FaceTime.
- Step 2: Toggle off FaceTime and then turn it on.
· 6.2 Restart the Device
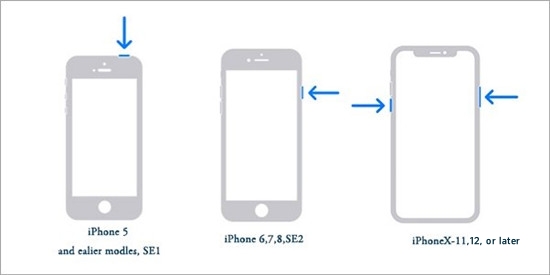
- Steps: Press and hold one volume button and the power button until the slider appears, then drag the slider. If you are using iPhone 8 or earlier, just press and hold the power button.
Fix 7: Reinstall the FaceTime App
If the issue persists, reinstalling the FaceTime app may help resolve potential issues with the app itself. And this can ensure the app is the latest version. Don’t forget to check the settings mentioned above after reinstalling.

- Step 1: Tap and hold the FaceTime icon on your Home Screen, and select Remove APP → Delete App.
- Step 2: Go to the App Store and search for FaceTime to install it again.
Fix 8: Check Software Update
Many people said that they encountered the FaceTime photos not saving issue in iOS 17. But it has been solved after updating to a later iOS version. If you have the same problem, check and install the latest iOS version.
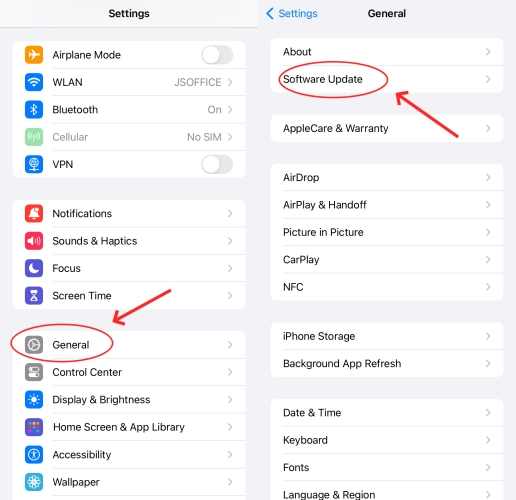
Steps: Go to Settings → General → Software Update, you will see whether your iOS is up to date, if there is an available update, choose Update Now.
Fix 9: Reset the Device [Data Loss]
Resetting your device to factory settings can help resolve persistent issues. This step should only be taken after trying all the other options and backing up important data.
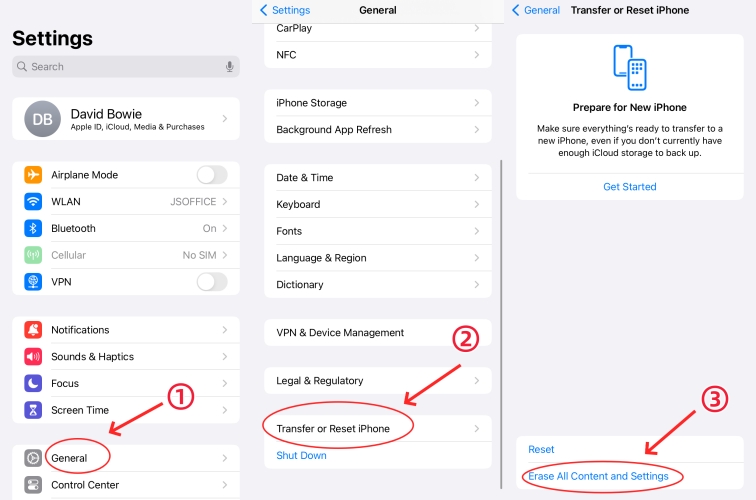
Steps: Go to Settings → General → Transfer or Reset iPhone → Erase All Content and Settings → Continue → Erase iPhone, and then enter your passcode.
Part 3. Advanced Fix with A Professional Tool without Data Loss [Effective]
If you want the easiest and safest way to fix the problem of FaceTime photos not saving, or if you have tried all the above methods without success, you can try this professional iOS repair software – Joyoshare UltFix. It can help solve 150+ iOS system issues with ease, including the FaceTime photos not saving issue. With just a few clicks, you can troubleshoot the potential problems and refresh the system at home.
- Fix FaceTime photos not saving without data loss
- No data loss during standard repair mode
- Support repairing a variety of software problems, up to 150+
- Free option to get into and get out of recovery mode
- Device manager to help reset, upgrade and downgrade devices
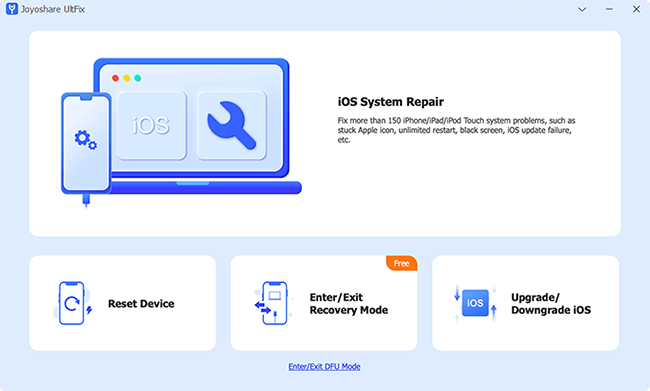
Step 1Select iOS System Repair
Use an original Apple USB cord to connect your device to your computer. Open Joyoshare UltFix and choose iOS System Repair. Then click the Start button.
Step 2 Choose Standard Repair
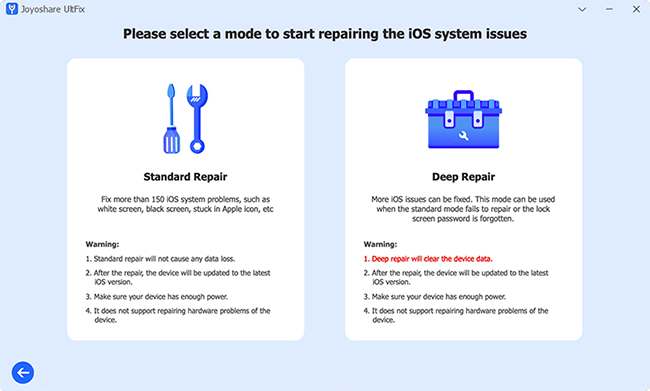
It provides two repair modes. Here you can choose Standard Repair, with which the problem can be fixed quickly without any data loss. Then you have to follow the guide to put your device into recovery mode.
Step 3Download a Firmware Package
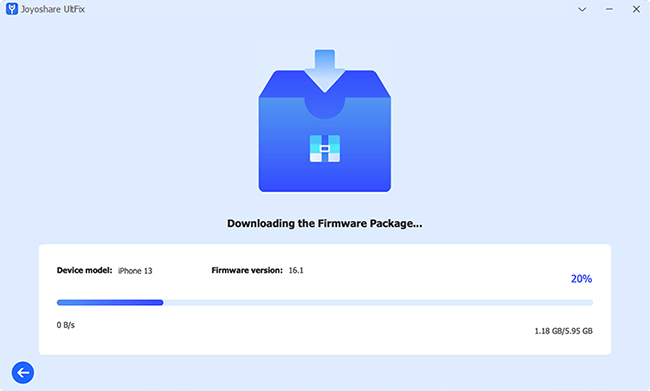
You can see the device information on the screen. Check the detected information and manually correct it if there is something wrong. Next, click the Download button to download a firmware package.
Step 4 Start the Repair Process
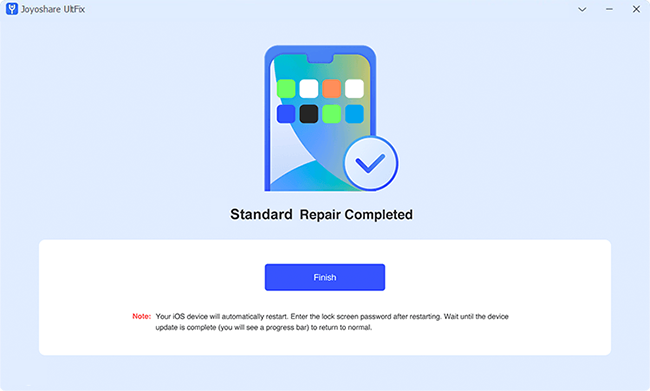
After the downloading process is finished, click the Start Standard Repair button and it will start to repair the device. Remember to keep your device connected to the computer during the whole process.
Part 4. Conclusion
Encountering the FaceTime photos not saving issue can be frustrating. But by following the steps listed in this article, you can identify and fix the problem. There are some basic fixes you can try on your device. Additionally, if basic fixes don’t work, consider seeking help from Apple support or professional tools like Joyoshare UltFix. Hope this article can solve your problem.
