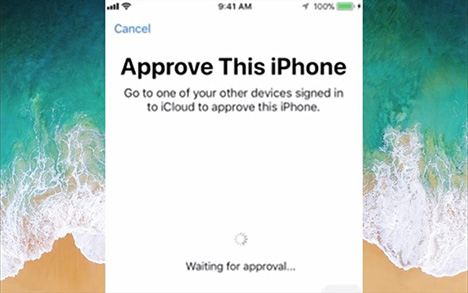
Often, the issue of "Approve This iPhone Stuck" happens if it has difficulty with authentication on iOS 11/12/13 while working with iCloud. After the analysis, it is found that several possible factors contributing to "Can't approve this iPhone" as shown above, can be summarized as the enabled iCloud keychain and two-factor authentication or problems with iPhone itself. Although this is undeniable that signing in to iCloud to approve the iPhone is to ensure higher security, sometimes, it will also put you in trouble. As a result, what this article mainly discusses is how to get you out of it with 3 mature solutions.
- Solution 1: Turn off iCloud Keychain
- Solution 2: Disable the Two-Factor Authentication
- Solution 3: Get It Fixed without Losing Data
Part 1. Toggle off iCloud Keychain
iCloud keychain is to keep private information like passwords and credit card info that you save up to date on the iDevice you approve. This info is encrypted and isn't readily divulged. Viewed in this light, it doesn't seem that this function will lead to the problem of iPhone stuck on "waiting for approval". Maybe it will or it won't, it really depends. Chances that earlier passwords saved by iCloud keychain is now not applicable to your new iPhone, which brings about the issue. Consequently, turning off iCloud keychain temporarily is the method you can try in such a case. The steps are illustrated below.
Step 1: Firstly, please get out of the "Approve This iPhone" screen by clicking "Cancel" button;
Step 2: Then get into "Settings" and tap on your Apple ID;
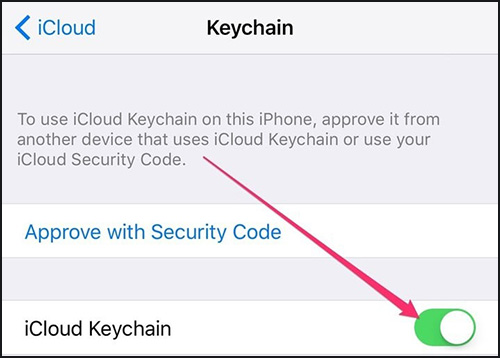
Step 3: After accessing, just choose the "iCloud" option and touch "Keychain";
Step 4: Lastly, you just need to slide the icon to turn it off.
Part 2. Turn off the Two-Factor Authentication
Two-factor authentication is developed to keep anyone else from getting access to your Apple ID even if he or she knows the password. With this feature, your account can only be got into on the trusted devices. When you would like to log in to a new iPhone, you not only enter your password but also type the verification code that will be automatically sent to your iPhone. But it needs to be noted that the authentication with a new device is not always going well. The issue of "Approve This iPhone Stuck" tends to arise at this point. Under the circumstances, disabling two-factor authentication is the optimal solution to the issue.
Step 1: Similarly, exit the interface of "Approve This iPhone" with the "Cancel" icon;
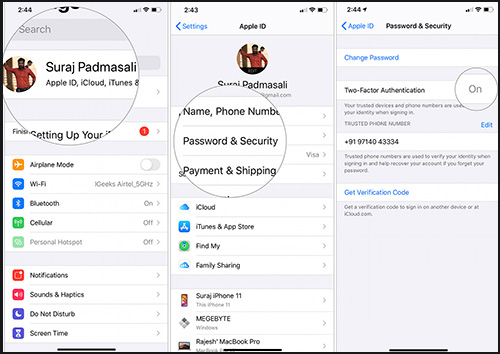
Step 2: Follow up visiting "Settings" on the home screen and hit the Apple ID;
Step 3: Tap on "Password & Security" option and then to "Turn Off Two-Factor Authentication";
Step 4: Now, your Apple ID and password will be reset and you will receive an email that guides you to turn it off.
Note: This technique can be only applied to the latest iOS version and Mac OS. By the way, in the interface where you choose "Two-Factor Authentication", you could attempt to touch "Get Verification Code", which may solve this problem as well.
Part 3. How to Fix "Approve This iPhone Stuck" with No Data Loss
When the above solutions are not for you, it is suggested that you take Joyoshare UltFix iOS System Recovery into account. As things go now, your iPhone system failures stand a good chance of causing the matter that iPhone stuck on "waiting for approval", in which using a credible program is an easy way out. To be frank with you, Joyoshare UltFix is expressly conducted to repair a lager number of system issues on iPhone/iPod/iPad and even Apple TVs.
Be as specific as possible, it gives you strength not only to work out ordinary iOS issues without the risk of data loss, such as iPhone stuck on verifying update, iPhone stuck on loading screen, etc but also to simply figure out complicated problems like iPhone is disabled. Beyond that, its advantages also lie in getting your iPhone into/out of recovery mode for free and supporting a train of iOS devices and iOS 13. In practice, it can do so much more. Outlined above is only a drop in the ocean.
Key Features of Joyoshare UltFix iOS System Recovery:
Flexibly provide you with two repair modes
Totally compatible with every iOS device and iOS 13
Resolve "Approve This iPhone Stuck" causing no data loss
Be able to repair a variety of iOS problems safely and quickly
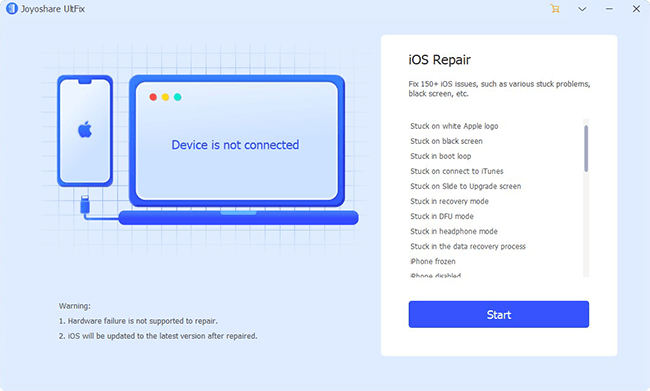
The step-by-step instructions to fix iPhone authentication issue via Joyoshare UltFix are as below.
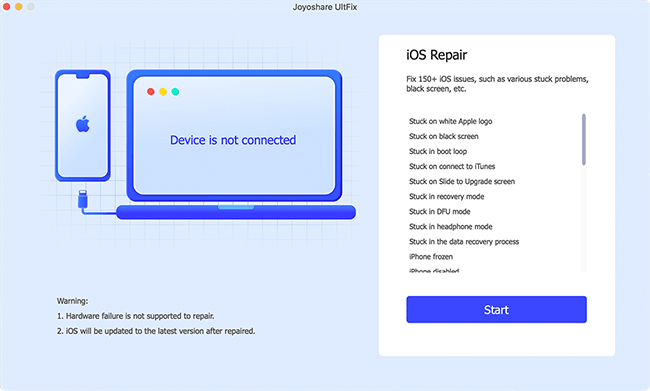
Step 1: First of all, install and launch Joyoshare UltFix on your computer. The next thing is to connect your iPhone and proceed with "Start" button;
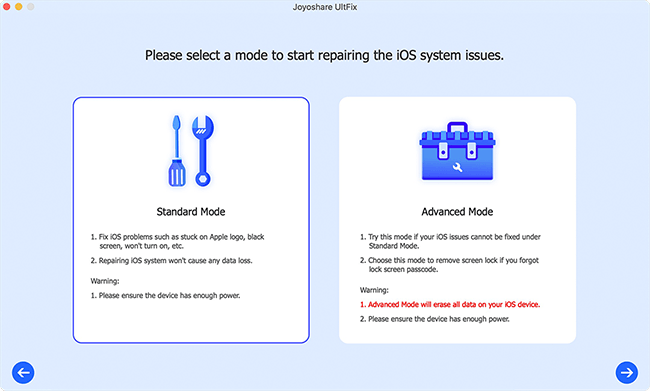
Step 2: Afterwards, please choose a mode to repair your iPhone issue. You can give preference to standard mode that repairs without causing data loss. Then click on "Next" to continue;
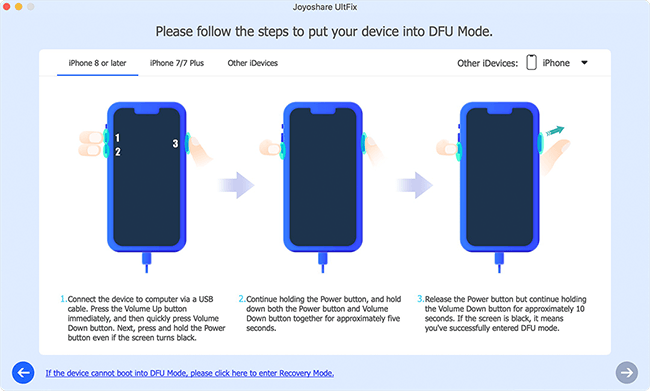
Step 3: Please hit on your iPhone model and then make your iPhone into DFU/recovery mode in the light of the on-screen directions. The link at the bottom is used for switching mode;
Step 4: It is needful to make a confirmation with your iPhone info on the screen prior to downloading and verifying a firmware package with the "Download" button;
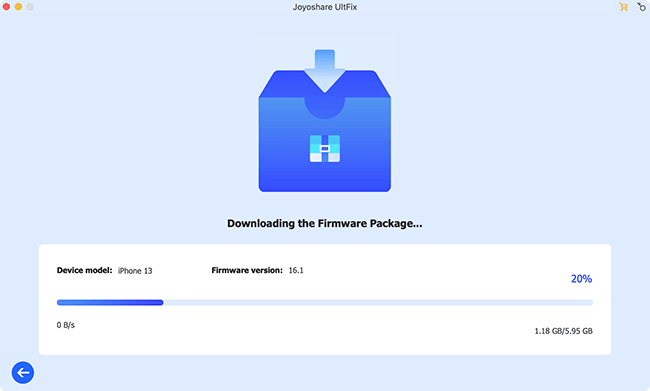
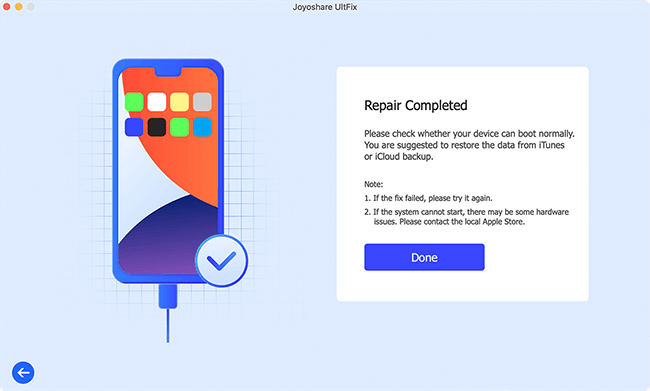
Step 5: When the verification ends, just hit on "Repair" to get the verified firmware package unzipped. A moment later, it will automatically fix your iPhone stuck on "waiting for approval".
