How to Install Jailbreak Tool to Jailbreak iOS on Windows
To bypass an activation lock, you need to jailbreak your iOS first. Although there is no jailbreak tool for Windows system, you can create a jailbreaking environment by yourself. Just follow the tutorial below to learn how to install a jailbreak tool to jailbreak iOS on a Windows OS computer.
- Tools you'll need:
- ● A computer that runs Windows OS 7 or higher
- ● A USB flash drive with more than 2 GB capacity
- ● Download the mirror writing tool – checkn1x-amd64.iso
- ● Download the jailbreak tool - rufus.exe
Part 1. Install Jailbreak Tool and Burn It to USB Flash Drive
- Step 1: Plug in a USB flash drive to your computer. Note that your data in the USB flash drive will be formatted, back up your data if needed.
- Step 2: Download the jailbreak tool - rufus.exe and start to install it.
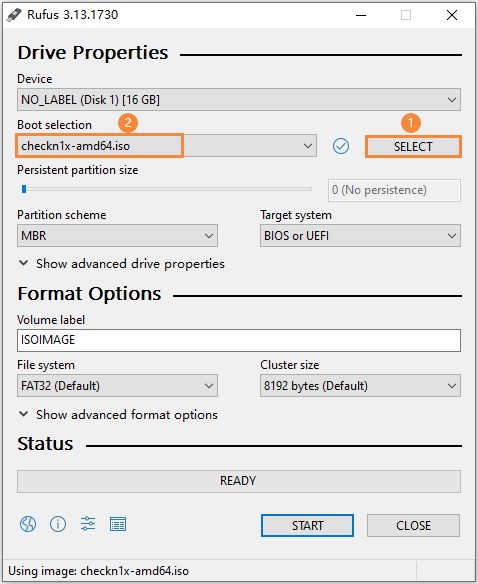
- Step 3: On the Drive Properties interface, hit the SELECT option to select the downloaded checkn1x ISO file. Then click the START button.
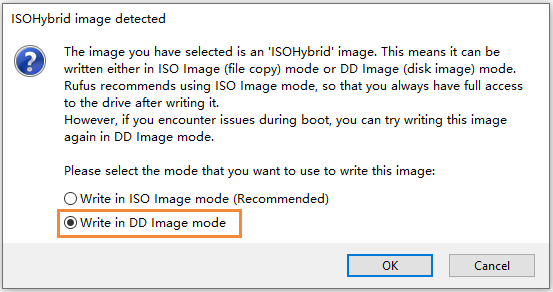
- Step 4: A warning message pops up. Select the "Write in DD Image mode" option and press OK button to continue.
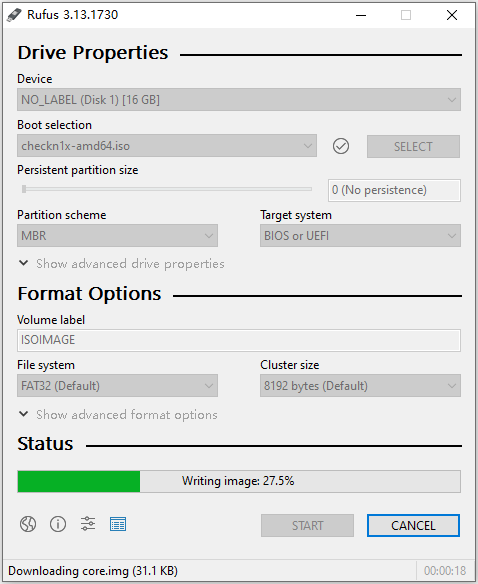
- Step 5: It starts writing. The process will take for 2~3 minutes.
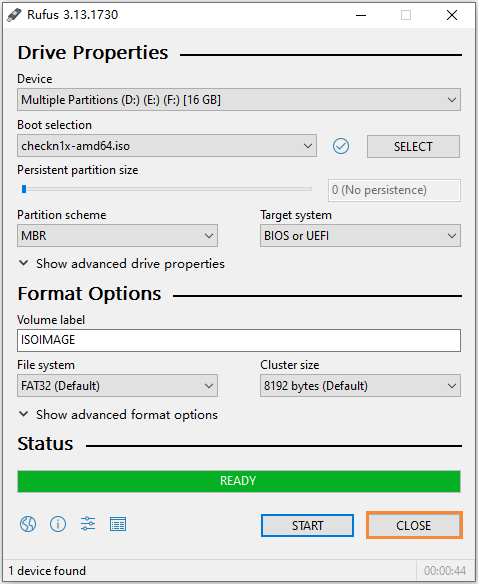
- Step 6: When it's ready, click the CLOSE button. The burning is completed.
- Step 7: Unplug your USB flash drive from the computer and plug it again, so that your Windows system can recognize it successfully.
Part 2. How to Use Checkra1n to Jailbreak iOS on Windows
- Step 1: Restart your computer. While the computer is powered and before Windows starts, tap the F12 key several times to access the Boot Menu.
- Note: For most branded computers, this shortcut key is F12. If it doesn't work, please try F10, F9, F8, Del, etc. Check the following list.
- Step 2: Select the USB flash drive you just used to burn the iso file.
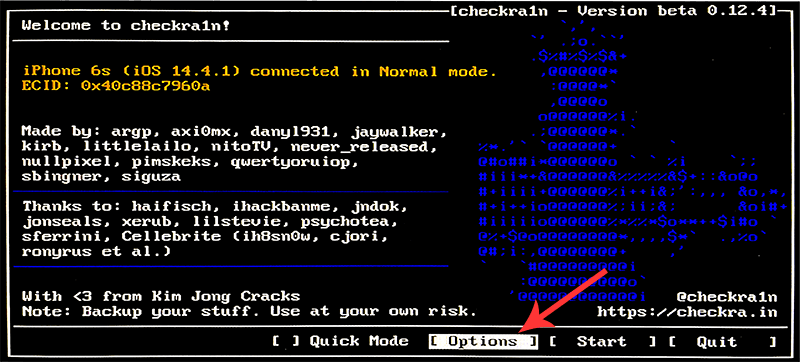
- Step 3: Connect your iPhone, iPad, or iPod touch to the computer. Use the arrow keys on the keyboard to choose "Options" and press Enter to set up the jailbreak tool.
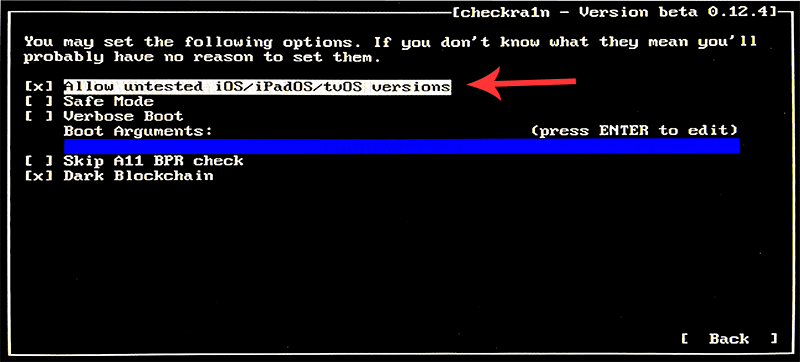
- Step 4: Then select "Allow untested iOS/iPadOS/tvOS versions" and press Enter.
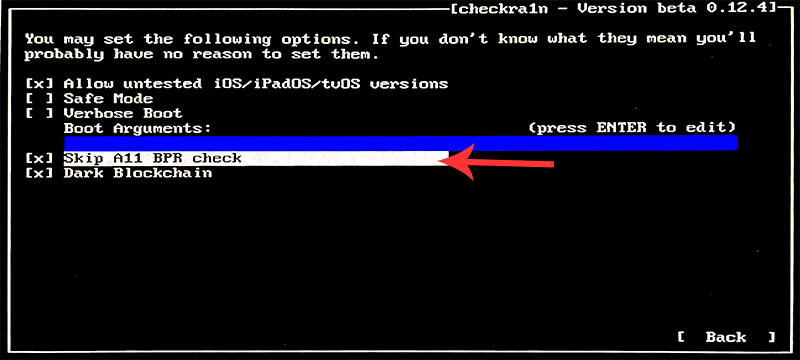
- Step 5: Select "Skip All BPR check" and press Enter.
- Note: For iPhone 8/8 Plus/X with iOS 14, you need to additionally check the "Skip All BPR check" option here as well.
- Step 6: After that, select "Back" and press Enter to return to the main interface.
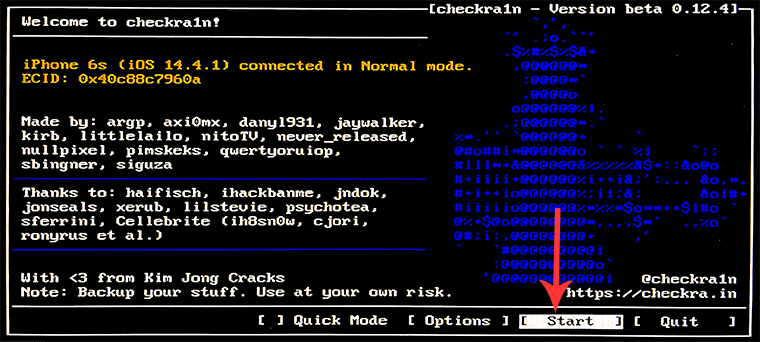
- Step 7: Now select "Start" and press Enter. And checkra1n will start jailbreaking iOS on your device.
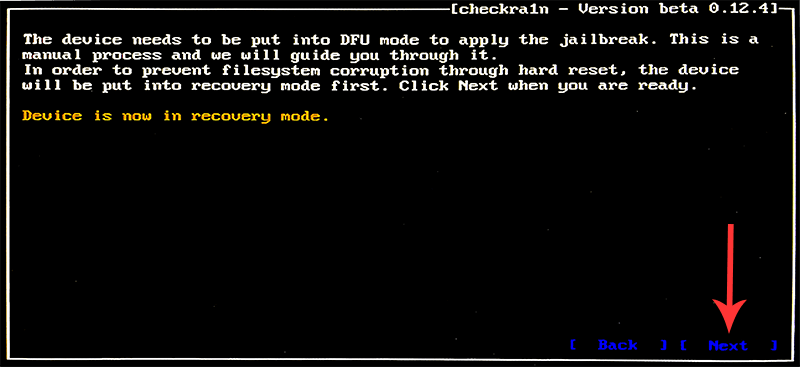
- Step 8: Before get started, your device needs to be put into DFU mode. Select "Next" and follow the onscreen instruction.
- Step 9: Select "Next" and checkra1n will automatically put your device into recovery mode first.
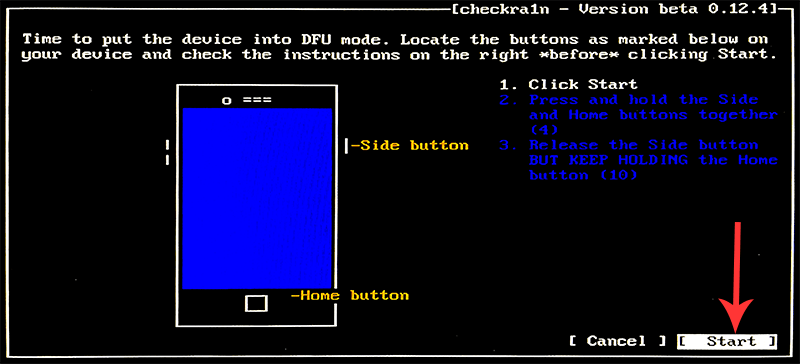
- Step 10: After it enters recovery mode successfully, follow the onscreen guide to put your iOS device into DFU mode manually.
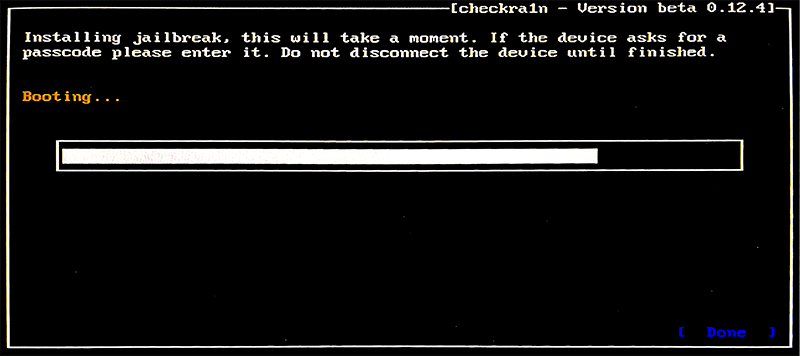
- Step 11: Now checkra1n will automatically jailbreak your device. Wait a while until the process is finished.
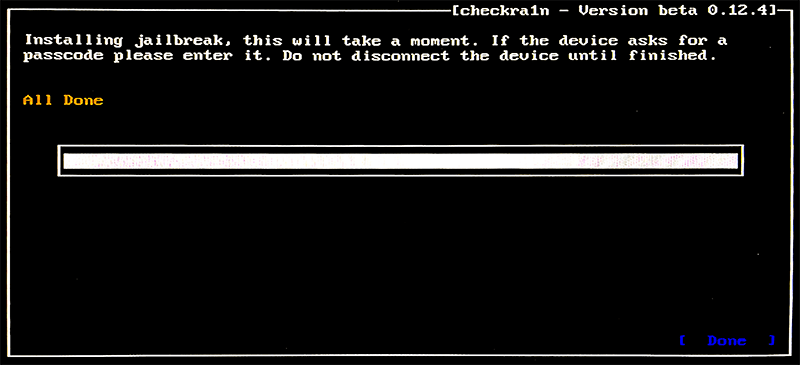
- Step 12: When "All Done" appears on the screen, it means your device is jailbroken successfully. Select "Done" and unplug your USB flash drive.
| Desktop Brand | Laptop Brand | Motherboard Brand | |
|---|---|---|---|
| F12 | Lenovo, HP, Acer, Hasee, eFound, THTF, Haier | Thinkpad, Dell, Lenovo, TOSHIBA, Samsung, IBM, Acer, Hasee, Haier,eFound, THTF, GIGABYTE, Gateway, eMachines | GIGABYTE, Intel, Cthim, SOYO, FOXCONN, Gamen, Topstar |
| F11 | MSI | MSI, ASRock, ONDA, Colorful,ECS, Gamen, Topstar | |
| F10 | ASL | ||
| F9 | HP, BenQ | BIOSTAR, GUANMING | |
| F8 | ASUS, BenQ | ASUS, YESTON, J&W | |
| ESC | Dell | ASUS, Sony | MAXSUN, UNIKA, SUPOX, Spark, SOYO, EPOX, UNIKA, Jet way, J&W, Colorful, ECS, SOYO, FOXCONN |
