Sometimes we may find a certain video file fails to play on our devices. Why does this happen? It's most likely that the specific video is in an incompatible format with the target device. In this case, we'll need a special tool that can easily convert the videos to desired format. Take the M4V videos for example. If you got any M4V file from iTunes, you'll be disappointed to find out they are only playable on Apple's devices only. Therefore, converting M4V to a more commonly used format, like MP4 is necessary if you want to play it on any other devices or players. Fortunately, there are a large number of video conversion tools available on the web for the purpose of converting M4V to MP4. In this post, we'll show you the top 2 of all M4V to MP4 converters so that you can easily convert any M4V file to MP4 on Mac.
- Part 1. M4V vs. MP4: What's the Difference
- Part 2. Convert non-DRM M4V Videos to MP4
- Part 3. Convert DRM-ed M4V to MP4
Part 1. M4V and MP4 - A Brief
M4V is basically a video container format developed by Apple and is quite similar to MP4. The primary difference is that M4V files can be optionally protected by the DRM copy protection. Apple generally uses M4V to encode the videos files in its iTunes Store. The M4V files can only be played on an authorized system (using iTunes). Apart from this, these files can also be played on few media players such as DivX Plus, RealPlayer, and Media Player Classic etc.
MP4, also known as MPEG-4 is a digital multimedia container format that is developed by International Organization for Standardization. It is commonly used to store video and audio, but can also be used for storing the subtitles and still images. It allows streaming on the internet like most of the container formats. Most of the portable media players are sometimes advertised as MP4 Players.
Part 2. How to Convert DRM-free M4V to MP4 on Mac
As M4V can be protected or unprotected, the first solution we are introducing here is to help you convert non-DRM M4V files to MP4 on macOS. If your M4V videos are downloaded from iTunes and protected by DRM, you should skip to the second solution below.
To convert common M4V videos to MP4, you can find a lot of video converter software available in the market. But if you are looking for a M4V converter that is clean, fast, and easy to use, then Joyoshare Video Converter for Mac should be your first priority.
Joyoshare M4V to MP4 Converter Overview
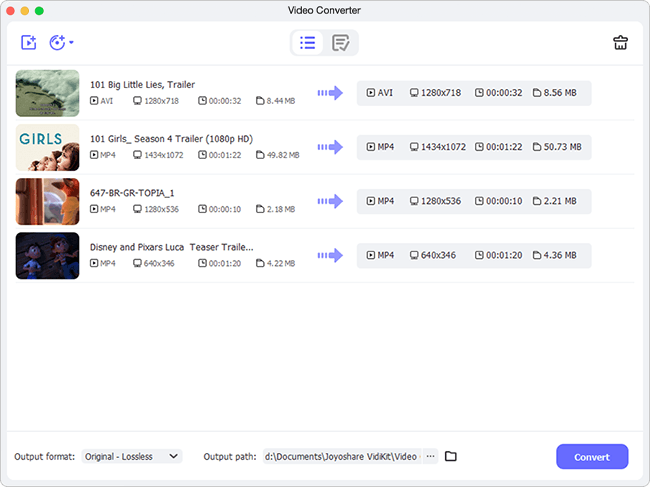
This stunning software lets you easily convert between over 150+ video and audio formats without any quality loss. It's able to encode the M4V video files to MP4 for playing on any device, including Apple iPhone, Samsung, Xbox, PS4, smart TVs, etc. You can also edit the video by cropping, cutting, trimming as you like. To make your videos more personalized, it allows you adjust the video bit rate, size, codec, etc. as flexibly as you wish.
In addition, this all-in-one video converter also converts M4V to other formats such as MPEG, FLV, AVI, MOV, etc. You can also use it to rip DVDs to videos if you like.
Convert M4V to MP4 without quality loss
Convert M4V videos to 100+ preset mobile devices
Edit and customize output videos flexibly with ease
Work at up to 30X super fast speed

Here is how you can convert M4V video to MP4 file format on your MAC computer using Joyoshare Video Converter.
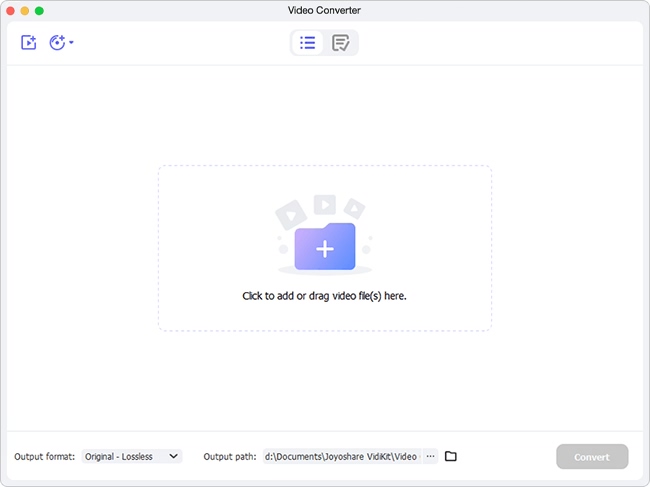
Step 1Add M4V files to Joyoshare Mac Video Converter
For adding the M4V videos to Joyoshare Video Converter, you can use two options. You can either drag the M4V video(s) or click on 'Add Files' button located on the center-top of the Converter for importing the M4V file(s). Batch conversion is supported by Joyoshare, so you can add multiple files at a time.

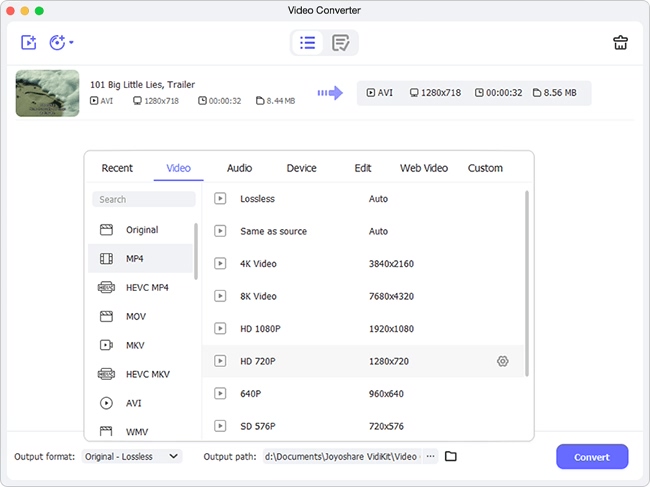
Step 2Choose MP4 as output format and customize other settings
Once the M4V files have been loaded successfully, you can select the output format by clicking on the drop –down menu. You have to choose MP4 file format.

If you wish to adjust the video parameters like frame rate, bit rate, codec, resolution etc., you can do so by clicking on the 'gear' icon located at the top-right corner and make the necessary modifications. You can even edit the video effects like adding watermarks, setting contrast etc.

Step 3 Start Conversion from M4V to MP4
Once you have customized the settings, you are all set to proceed with the conversion. Click on 'Convert' button. The conversion time will depend upon the video length and number of videos that are being converted. Usually, Joyoshare Video Converter is 30X faster than most of the video converters available on the internet.
Bottom Line
Joyoshare Video Converter can convert 150+ file formats into desirable output formats at 30X faster speed as compared to other popular video converters available on the web. So, if you are looking for a converter that is easy to use and super fast, Joyoshare should be your first choice.
Part 3. How to Convert DRM-ed M4V to MP4 on Mac
If your M4V movies are downloaded from iTunes Store, Joyoshare Video Converter won't work as those M4V videos are protected by Apple's DRM. For those files, you need to seek for an exclusive iTunes movie converter online. There are many well known names, such as TunesKit, Noteburner, Aimersoft, etc. To save your time, we'll pick TunesKit DRM Media Converter to show you how to convert DRM iTunes M4V to MP4 on your macOS.
Step 1Download and install TunesKit on your computer
First of all, you should download the trial version of TunesKit DRM Media Converter for Mac from its official site.
Step 2Add iTunes M4V movies to the converter
Launch the program, then click the 'Add' button to import your iTunes M4V videos to the converter.
Step 3Set output format as MP4
Click the Format section to choose the output format as Lossless MP4 or HD MP4 as you like. For the first option, you will get the DRM-free videos with exactly the same quality as original movies.
Step 4Start to convert DRM M4V to MP4
Now begin to convert the iTunes movies to MP4 format by clicking 'Convert' button.
Note: It appears currently this iTunes DRM removal tool for Mac doesn't support the latest High Sierra yet. To make it work as expected, make sure your macOS is Sierra or lower. Otherwise you are suggested to test out the Windows version instead.


