As we may know, Live Photo is not merely a photo nor a video, but a combination of still image and movie. It was first introduced by Apple for iPhone 6s and 6s Plus and later spread widely on other smart phones like some Android phones. When you capture a Live Photo on your phone, it creates a MOV or MP4 file and a JPG file together. But how will you view them on your computer that runs Windows 10? How to convert Live Photo to still on PC, so that you can share it with others? In this article, we have found out an easy and quick way to view and convert Live Photo on Windows 10.
The Tool You'll Need – Joyoshare LivePhoto Converter
Before showing you how to view and convert Live Photos on Windows 10, we're going to introduce a professional and easy-to-use Live Photo converting tool called Joyoshare LivePhoto Converter for Windows.
This is a desktop-based photo converter that allows you convert both iOS and Android Live Photos on Windows 10 with high original quality preserved. It supports more than 6 kinds of output image formats including still images like JPG, BMP, PNG, TIFF, and WEBP and animated one like GIF, so that you can easily choose the one you want.
With Joyoshare Windows LivePhoto Converter, you can view and edit Live Photos based on your preferences, such as play Live Photos, rename them, extract frames from Live Photos, keep the aspect ratio, etc. Besides, you're also allowed to convert Live Photos individually or in batch.
Key Features of Joyoshare LivePhoto Converter:
Support to view and convert Live Photos on Win 10
Support to convert both iOS and Android Live Photos
Real-time preview function is available
Up to 6 supported output image formats
Compatible with Windows 10/8/7/Vista/XP
Next let's move to the step-by-step guide on how to view and convert Live Photo to still on Windows 10 with Joyoshare LivePhoto Converter.

Part 1. How to View Live Photos on Windows 10 with Joyoshare
Step 1 Launch Joyoshare and sync Live Photos to PC
At first, please download Joyoshare LivePhoto Converter for Windows and install it on your PC. Next use an original USB cable to connect your device to the computer and transfer all Live Photos you want to the PC.
Step 2 Import target Live Photos to Joyoshare

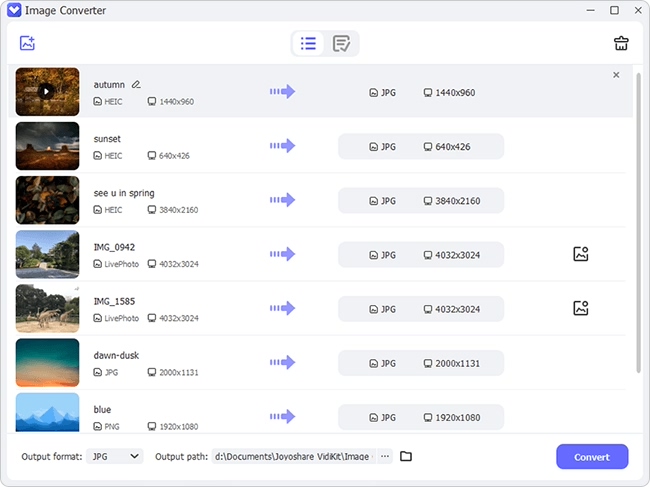
Then simply launch Joyoshare program and drag and drop one or multiple Live Photos (or the folder) to the main interface of the app. Alternatively, you can click the "Add file" button to navigate to the target Live Photos and import them.
Note: A JPG file and a MOV/MP4 file is called one Live Photo file, so you need to import both JPG file and video file with the same name to Joyoshare at a time.
Step 3 Play and view Live Photos on Windows 10

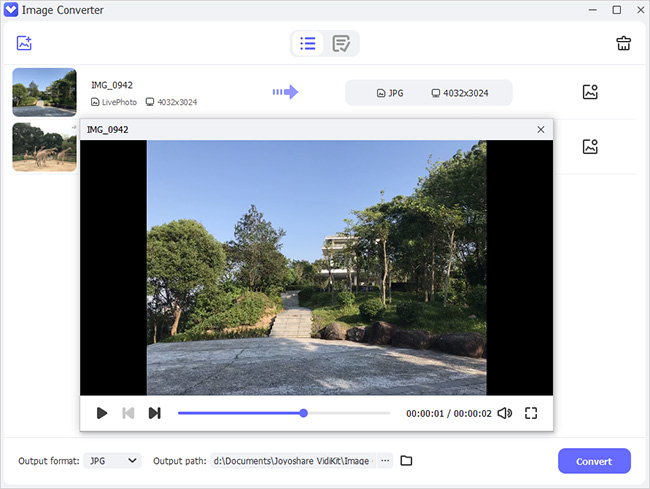
Now click the "Play" icon
 beside the Live Photo file, and Joyoshare will play it for you, so you can view all Live Photos on Windows with one click.
Part 2. How to Convert Live Photos to Still on Windows 10 with Joyoshare
Step 1 Select satisfied still frames (optional)
After adding target Live Photos to Joyoshare LivePhoto Converter successfully, you can now click the Edit icon to activate edit windows. Now you can see dozens of still images in one Live Photo file and choose the most satisfied ones you want.
Step 2 Set an output format

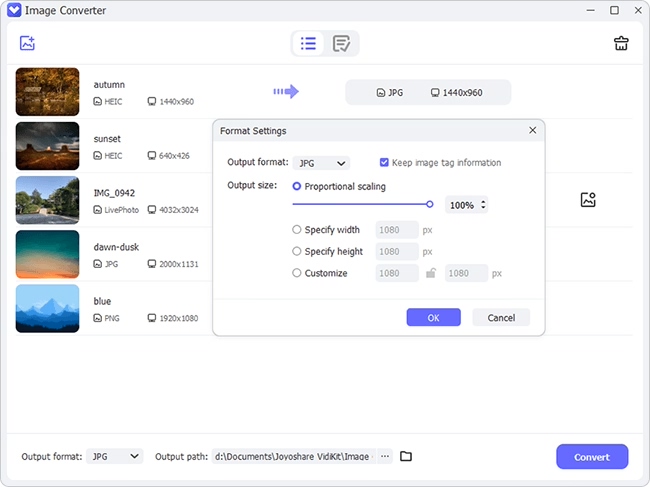
Now click the "Format" panel and select an output image from JPG, PNG, BMP, GIF, WEBP, TIFF. Change the resolution and adjust the quality if needed. Then click the "OK" button to close the window.
Step 3 Convert Live Photo to still on Windows 10

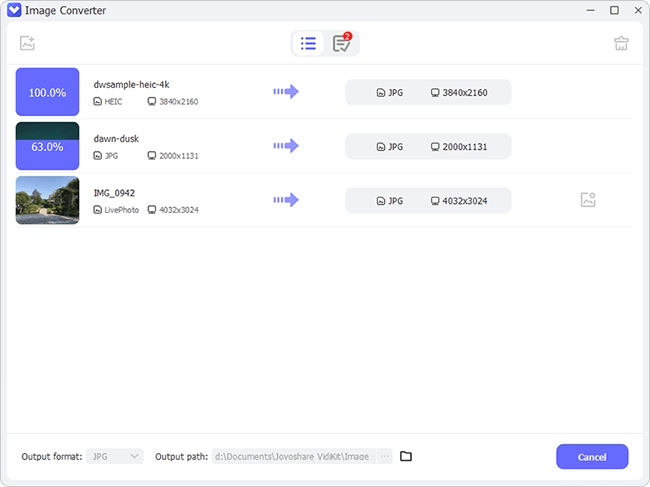
Next click the "Convert" icon and let Joyoshare start to convert Live Photo files to still images on Windows 10. A few seconds later, you'll find all the converted files on the local folder of your computer, and you can click the "Converted" folder to have a check.


