With the release of iOS 11, an innovative and prominent technology was brought to the world. It is a new special image format-HEIC that is known as effective format which can store images with less file size compared with JPG while can retain the original high quality. The most important point is that HEIC allows the storage of multiple images in one file, including live photos, animations together with burst shots. Just as the old saying goes, everything has two sides. There are always advantages accompanied with disadvantages. Due to its limited compatibility, HEIC can only be viewed on iOS 11 devices and macOS High Sierra. Specifically speaking, it is not available for most of applications to open it, such as Android phones, tablets, Windows computers, etc. If you are just wondering how to view HEIC photos on your Windows PC without any problem, here are some useful advices you can't miss.
- Part 1. View HEIC images on Windows by using offline HEIC converter
- Part 2. View HEIC images on Windows by using online HEIC converter
- Part 3. Setup preferences on iPhone devices
- Part 4. Share HEIC images with email or upload to a cloud
1. View HEIC images on Windows by using offline HEIC converter:
If you would like to view and save HEIC images without further trouble, Joyoshare HEIC Converter can help you to realize it. It is a professional tool specially designed to convert HEIC images to JPG format as well as other practical output formats, such as PNG, BMP, GIF, TIFF, and WEBP. No matter what kind of modes you want to choose, Joyoshare HEIC Converter can make it with ease. You can convert single HEIC image at a time or even multiple HEIC images in batch. Having adding HEIC images into Joyoshare HEIC Converter, you can preview all photos. However, after conversion, all these HEIC images can be saved in your local folders forever. You can open no matter which one you want to see.
If you need, please follow the below guides:
ps: If you prefer a more detailed guide on converting HEIC to JPG, please visit this page: How to Convert HEIC to JPG.
Step 1 Sync iOS 11 HEIC images to your computer
Sync and save all iOS 11 HEIC images from iPhone/iPod/iPad to your computer firstly so that you can add files to Joyoshare HEIC Converter.
Step 2Import HEIC images to Joyoshare HEIC Converter
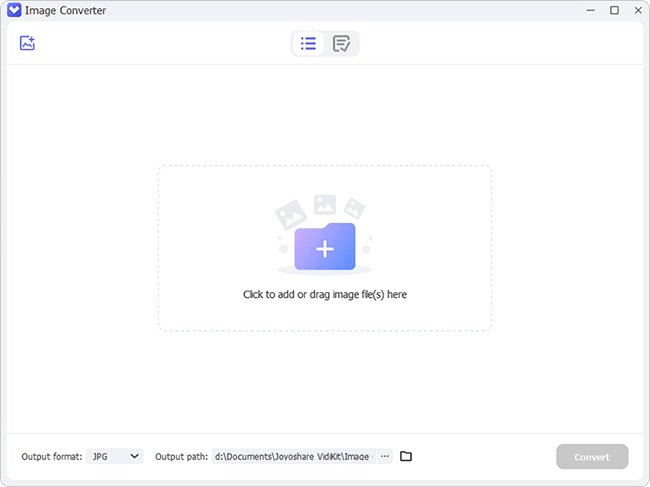
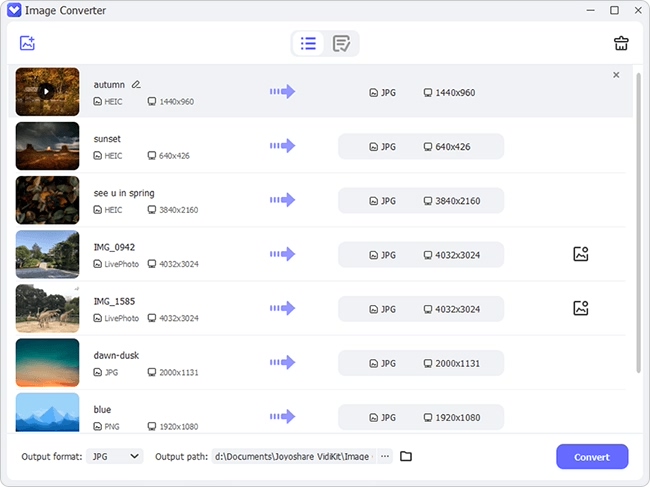
Open Joyoshare HEIC Converter and then add HEIC images to it by dragging HEIC image(s) or folder(s) directly to main interface or clicking "+" button at the bottom left corner. It supports both individual conversion and batch conversion.
Main interface:

Add files:

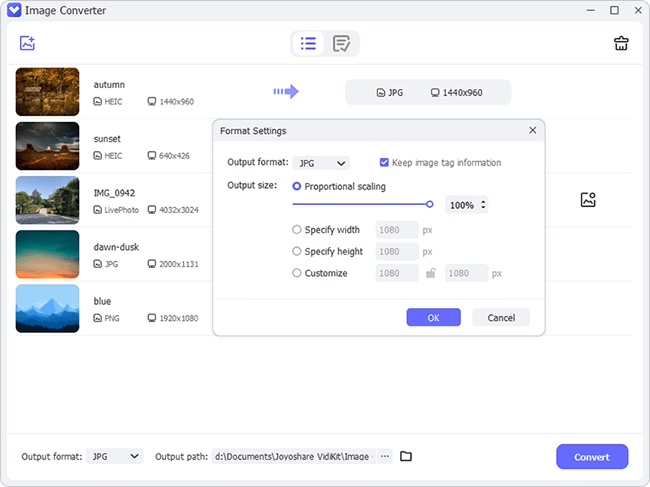
Step 3Customize output images
Click the frame near to "Format" at the bottom to setup output format, adjust image(s)' resolution and quality. At the same time, you can decide whether to tick following three options: Output all images; Keep aspect ratio; Keep Exif information.

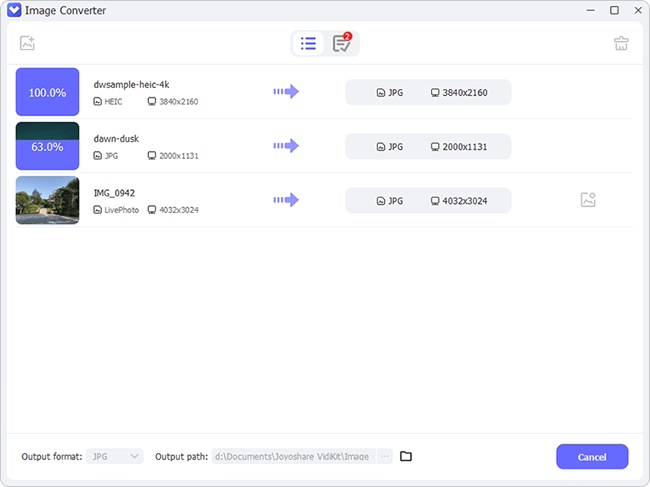
Step 4Start to convert HEIC to JPG or other formats

2. View HEIC images on Windows by using online HEIC converter:
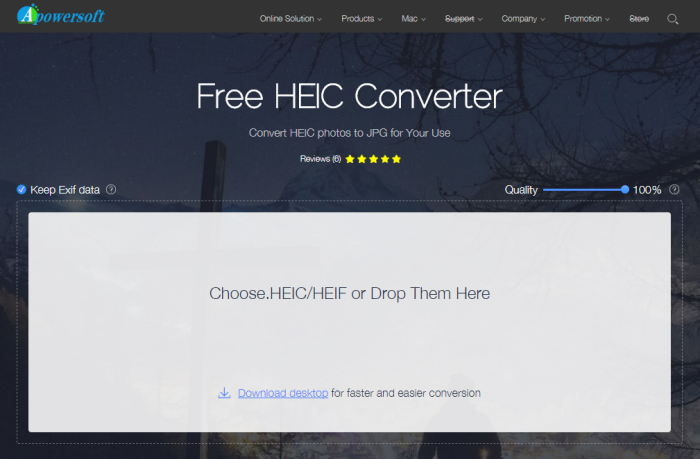
If you dislike downloading and installing a converter on your desktop, you can finish HEIC images to JPG conversion online directly. Apowersoft Free HEIC Converter can provide you with an online platform. Opening a browser and entering www. Apwersoft.com, you can get to know how to operate step by step with its clear interface. What you need to do is click the "Choose .HEIC/HEIF or Drop Them Here" button and import the HEIC images. It is really a time-saving solution if you are in emergency. But please keep in mind tha you can convert only up to 30 pieces of HEIC photos which supporting single conversion as well as batch conversion. Besides, all converted images need to be downloaded one by one from cloud.
3. Setup preferences on iPhone devices:
If you are looking for an easier way to view HEIC images on Windows or any other devices without converting all through converters, here a fundamental one you can use. There is no doubt that iPhone has its own solution as it designs this new function. You can setup your iPhone to save photos with JPG format instead of HEIC so that your HEIC images can be converted to a compatible format automatically when transfer them to Windows or Mac or any other devices. The following steps will lead you to access your HEIC images:
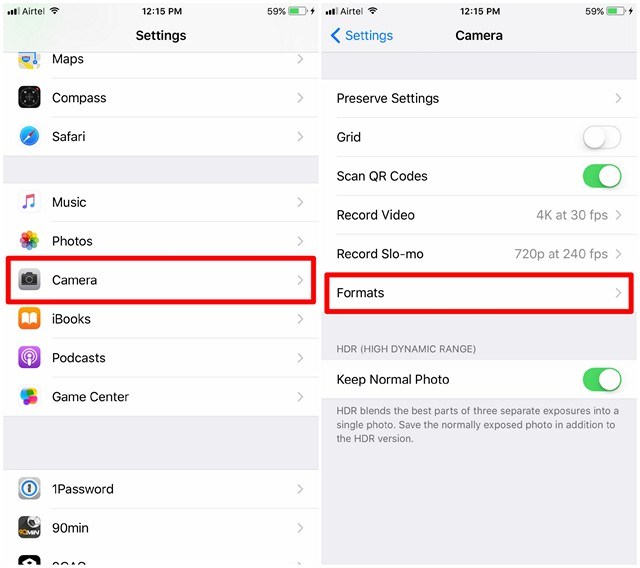
Step 1: Open your iPhone and click "settings" application
Step 2: Choose "Camera"
Step 3: Tag on "Formats"
Step 4: Set "Most Compatible" as your output formats
(If you choose "High Efficient", the images will be saved with HEIC format as it can compress the file size without damaging original quality. However, "Most Compatible" will use the most popular format-JPG, owing to its great compatibility.)
4. Share HEIC images with email or upload to a cloud:
Maybe you have saved some HEIC images before you know how to setup the settings of camera and you'd love to open them with a valid approach. Now, there are two similar modes available to meet your requirements. What you need to do is to send an email to android phone or upload HEIC images to a cloud considering it can convert them to JPG format automatically. When an email is written, you are required to choose images' size. If you want to preserve the best quality, it's better to choose original file size. However, if you prefer to a cloud storage, you will see all HEIC images saved with JPG format when finish uploading process.
Step 1: Open your email and start to write a new one
Step 2: Import HEIC images that you want to convert as attachments
Step 3: Send email to other email account and then your HEIC images will be converted to JPG automatically
Step 4: You can see these HEIC images on your mobile phone or computer by using your own account

Above methods are of great help to make HEIC photos compatible with Windows OS, choose whichever satisfy you!
