Dropbox is an excellent program which provides considerate file sharing and storage solution to both business teams and individuals. You can back up all your documents securely, create access to your information fully and share beneficial files with others flexibly. However, after the release of HEIC, thousands of users wonder how to apply Dropbox to manage this new image format orderly. Hence, we list possible issues to answer and attach in-depth tutorial to let you manage HEIC photos effectively.
- Part 1. Upload HEIC Photos to Dropbox
- Part 2. Share HEIC Photos on Dropbox
- Part 3. Download HEIC Photos from Dropbox
- Part 4. Create HEIC Photos Album on Dropbox
- Part 5. Convert HEIC to JPG with Powerful Tool
Part 1. How to Upload HEIC Photos to Dropbox
Dropbox delivers a wonderful platform to users to better sort out HEIC files orderly by uploading them in perfect synchronization. At the same time, it adds support to choose the image format in thoughtful way as long as you have updated your Dropbox iOS app version to at least 64.2.2. The detailed steps are as below:
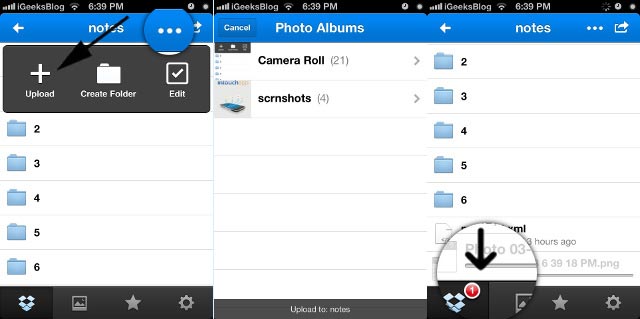
1. Run your Dropbox app and tap the "+" button.
2. Once you click "Upload Photos", you will see an informative interface asking you "How do you want to save photos?" It allows you to hit the option "Save HEIC Photos as" and decide to upload images as JPG or HEIC.
Note: This setting will take effect only for the images to be uploaded at a later time and will not have influence on the previous existing images. Certainly, you can also adopt automatic camera to upload photos, which will confirm the image format with you as well.
3. Given that you choose "HEIC" as image format, now you can select your HEIC images and choose a folder to save uploaded photos.
4. Hit "Upload" button to finish the whole process.
Part 2. How to Share HEIC Photos on Dropbox
Not everyone knows this new iOS 11 image clearly so that you can share them with your friends or families. It is available to view HEIC photos by taking the aid of Dropbox. To make it exactly, you can follow my instruction:
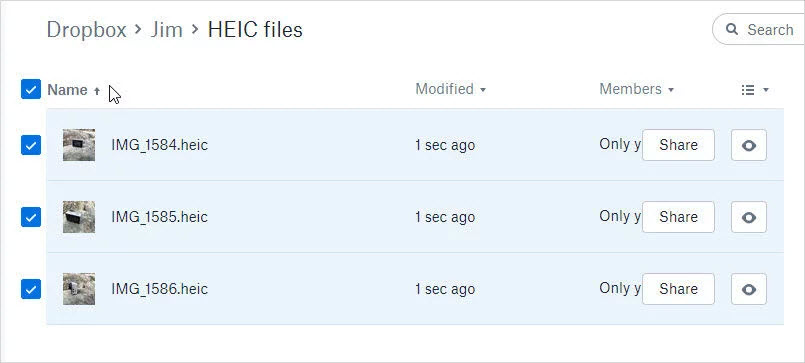
1. The indispensable step is to transfer and upload all your HEIC images to Dropbox firstly.
2. Pick up the HEIC photos that you want to share to anyone who you like.
3. Simply hit the "Share" button located on the right, which will requires you to choose desired contacts.
4. After deciding the emails or name, you can press "Send" icon to complete your operation.
Part 3. How to Download HEIC Photos from Dropbox
If you would like to download HEIC images from Dropbox to your own device locally, you can also find a feasible way to do it. With only two simple steps, you can know how to download photos from Dropbox easily.

1. Log in your Dropbox account and locate the HEIC files you want to download.
2. You will see "..." icon. Click it and there will show more other options, including "Invite to folder", "Share link", "Download", "Delete" and "Rename". Hit the "Download" button and Dropbox will work for you.
Part 4. How to Make HEIC Photos Album on Dropbox
To keep your HEIC files organized, you can add HEIC photos to album at your will. It will not be complicated as long as you do it at every step by referring to my following guide:
1. Sign in Dropbox with your account and head to photos.dropbox.com.
2. Select HEIC photos to be imported to album.
3. Hit "..." icon and choose the "Add to album" option.
4. Press "Create new album" and rename it in your way.
5. Dropbox will help you add all target HEIC photos to the new album.
Part 5. How to Convert HEIC to JPG in High Quality
As a space-saving image, HEIC is known as the most efficient format. Nevertheless, it is developed with limited compatibility. You can only view and open it on iOS 11 devices as well as macOS High Sierra without problem. To make it more acceptable and readable, you can convert it to JPG. Here Joyoshare HEIC to JPG Converter comes to assist.
To facilitate you to convert HEIC in a fast way, Joyoshare HEIC Converter creates a platform to convert your HEIC photos to JPG in batch. Alternatively, you are allowed to covert HEIC images one by one if the quantity is not large. With the exception of JPG, Joyoshare HEIC Converter also empowers you to export converted photos as PNG, GIF, BMP, TIFF and WEBP.
Essentially, it has the capability to recognize all types of HEIC images as valid files. Full-featured as Joyoshare HEIC to JPG Converter is, it includes thoughtful support to adjust quality and set resolution based on your preferences. It can also be used to output all images, keep aspect ratio together with preserve EXIF metadata. Importantly, you don't have to worry about the privacy issue as it will accomplish conversion offline.
Key Features of Joyoshare HEIC to JPG Converter:
Convert HEIC to JPG and other formats professionally
Support convert HEIC images individually or in batch
Make quality-adjusting and resolution-setting possible
Keep EXIF information completely
Can recognize kinds of HEIC images, including photo bursts, animation, etc
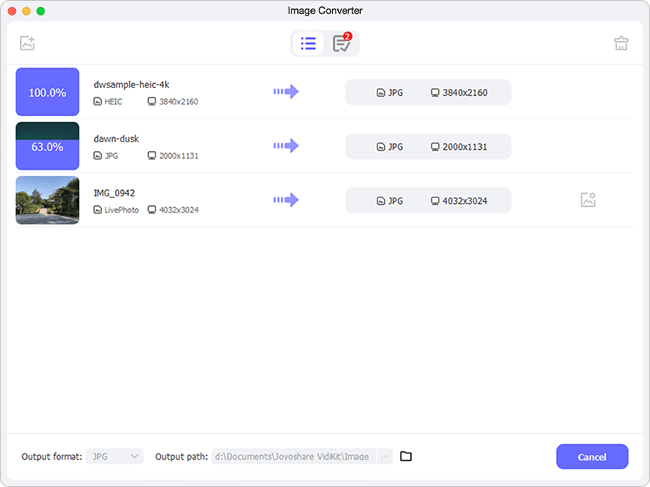
Step 1 Transfer HEIC photos to your computer
To fulfill the conversion procedures, you have to sync all HEIC images to your PC in advance.
Step 2 Import HEIC photos to conversion list
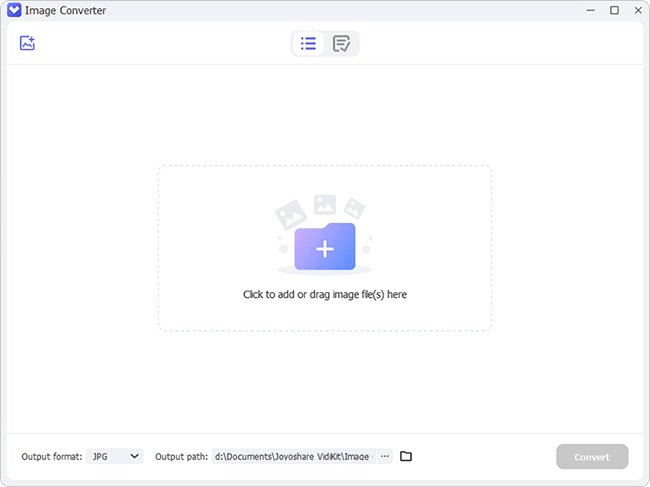
Joyoshare HEIC to JPG Converter enables you to drag HEIC files to the main interface or simply click the "+" button on the left bottom.

Step 3 Choose output format and adjust quality
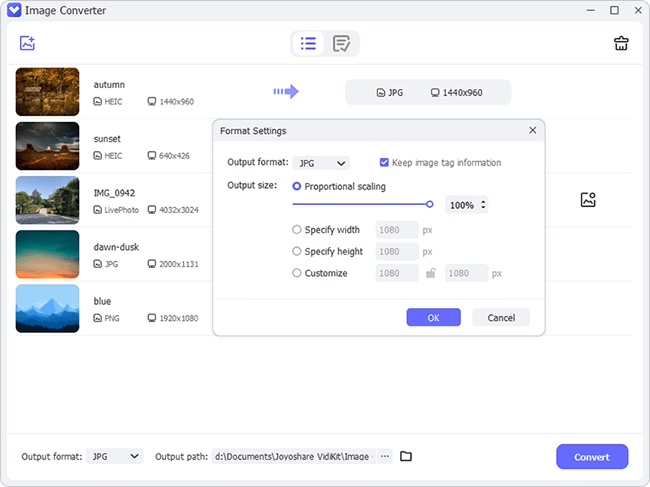
From the "Format Setting", you can choose "JPG" as output format. Besides, customize resolution and adjust quality in your way. Note that if you change the resolution, you'd better tick "Keep aspect ratio" to maintain high quality of conversed photos. It also supports keeping EXIF information if you need.

Step 4 Start to convert HEIC photos to JPG
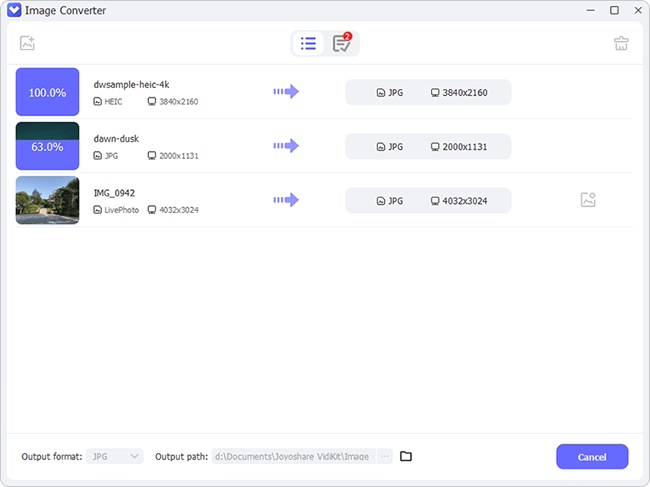
Now you can press the conversion button. The conversion process will be completed in few seconds. Any converted photos will be saved automatically in "History folder".

