A series of iOS new versions will be released by Apple Inc. annually. More and more users have updated their mobile operating system to the latest version owing to attractive and comprehensive new functions. Though most previous problems have been improved, users are depressed again because of HEIC.
- Part 1. The definition of HEIC
- Part 2. Learn more about Joyoshare HEIC Converter
- Part 3. In-depth tutorial of converting HEIC to JPG
What's HEIC?
HEIC, also called HEIF, is the short form of High Efficiency Image Format, which has been applied to Apple's iOS 11, the operating system of iPhone X, iPhone 8/8Plus, iPhone 7/7Plus and macOS High Sierra. It is a powerful image format that can compress files size more efficiently than present popular image format, JPG, with less space and original high quality. What interests you is that it can support multiple images in one file, for example, a sequence of Apple's live photos as well as animation with plenty of images. However, HEIC images cannot be viewed on older iOS, Mac, Windows and any other devices.
Obviously, it is necessary for you to convert HEIC files to other formats in order to open it on any non-iOS 11 operating system. Don't worry about how to look for a best solution any more. Joyoshare HEIC Converter can provide you whatever you want.
What's Joyoshare HEIC Converter?
As a perfect HEIC to JPG converter, Joyoshare HEIC Converter can not only convert HEIC images to JPG, the most popular format, but also support more output formats, including PNG, BMP, GIF, TIFF, and WEBP. Without damaging high quality, you can use it to finish conversion process within a few seconds, which can support convert one file at a time or convert files or folders in batch.
What's more, there are different options offered so that you can adjust relevant parameters on the basis of your own requirements. Both resolution and quality can be changed by you. Of course, you can decide whether to choose outputting all images, keeping aspect ratio or keeping Exif information. Most importantly, you can remove your misgiving of private problem because Joyoshare HEIC Converter will not share files to iCloud. Now, you must wonder how to convert HEIC images to JPG. Follow me!
How to Convert HEIC to JPG?
Step 1 Sync iOS 11 HEIC images to your computer
Guarantee that all iOS 11 HEIC images you need to convert are synced and saved from iPhone/iPod/iPad to your computer firstly so that you can add files to Joyoshare HEIC Converter.
Step 2Add HEIC images to Joyoshare HEIC Converter
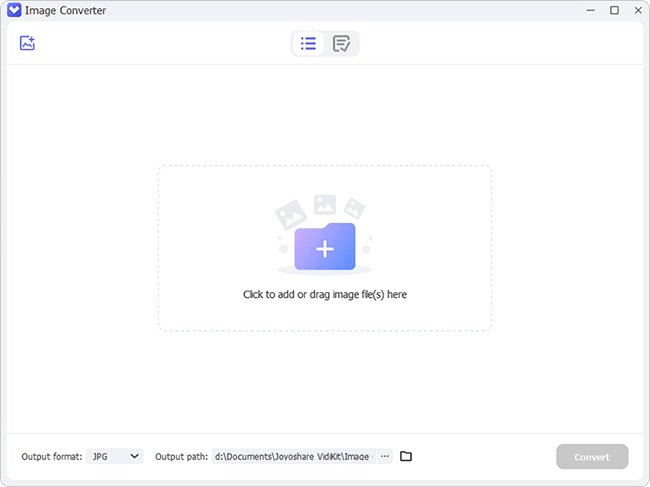
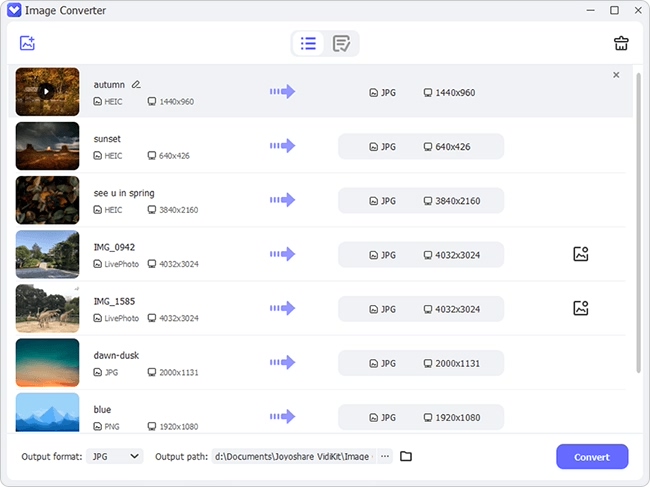
Upon launch Joyoshare HEIC Converter, you can import HEIC images to it through the following two approaches: drag HEIC image(s) or folder(s) directly to main interface or click "+" button at the bottom left corner. It depends on you that convert only one image or multiple images at a time.
Main interface:

Add files:

Step 3Customize output images
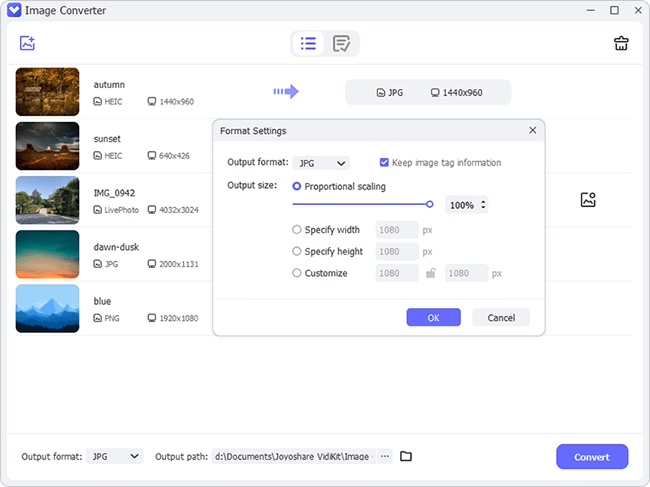
When HEIC images are listed in Joyoshare HEIC Converter, you can click the frame near to "Format" at the bottom to setup output format, adjust image(s)' resolution and quality. In addition, you will see the following three options: Output all images; Keep aspect ratio; Keep Exif information.

Note:
Output all images: Considering HEIC is a special format that can include a sequence of Apple's live photos as well as animation with plenty of images. If you tick this one, you can find all images in your destination files. Otherwise, only main image can be converted.
Keep aspect ratio: When the resolution adjusted is not same as the original image, the converted one will be different in aspect ratio and the output image can even become blurred. To maintain original aspect ratio, you need to tick this option and then you will see the output one with Gaussian blur.
Keep Exif information: The output files will show Exif data for a photo made with a typical digital camera. Exif information includes Manufacturer, Model, Orientation (rotation), Date and time, Exposure bias, FlashPix version and so on. Only when you choose JPG as your output format can you see this option.
Step 4Start to convert HEIC to JPG or other formats
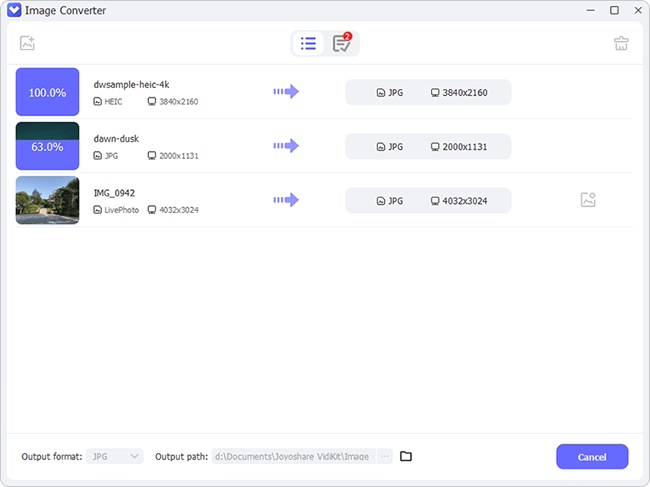
When you have setup and revise all information, you can start the conversion process by click conversion button at the bottom right corner.

After conversion, you can locate your destination files by click "history folder" icon at the central bottom or you will see a popup folder with converted images.
Now download the easy-to-use Joyoshare HEIC to JPG Converter and begin to enjoy the fun!


