How to compress video for Vimeo? The search on the Internet will return a plethora of answers. Although you can use compression software, understanding the program's functionality is essential. Alternatively, you need a reliable, efficient, and affordable tool that produces professional results. When you compress a video, you will lose quality. However, you can avoid the process and enhance the quality without increasing file size with the right software. Today, you will learn about the five leading different ways to compress your video to post on Vimeo without losing the original quality.

- Part 1. Joyoshare VidiKit
- Part 2. Wondershare UniConverter
- Part 3. MacX Video Converter Pro
- Part 4. Apeaksoft Video Converter Ultimate
- Part 5. AnyMP4 Video Converter Ultimate
Part 1. Simple Way to Compress Video for Vimeo - Joyoshare VidiKit
Joyoshare VidiKit is a platform where you can perform multiple functions without having to choose different software. This software supports all the media formats, making it simple to choose the desired output according to your need. You can compress large videos as many as you want under 40X amazing speed. It also compresses files by specifying size or compression degree.

- Dual mode to compress video files for Vimeo
- Change resolution and format before compression
- Compress WMV, AVI, WAV and more
- Output your videos with high quality
- Customize output location and compress ample videos in bulk
Step 1 Open Joyoshare VidiKit and Add Video Files
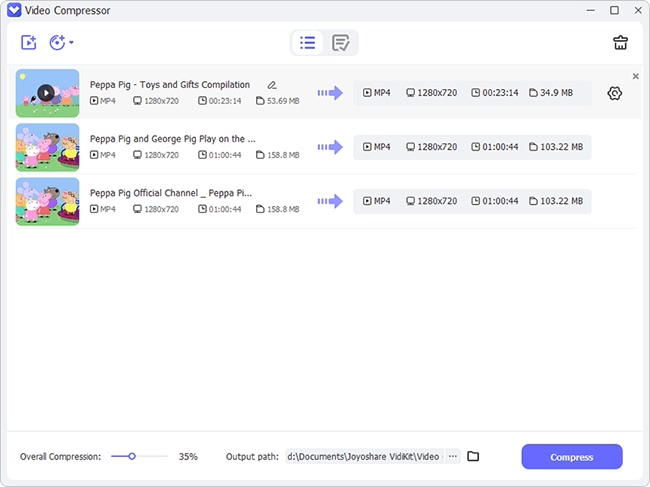
Launch the software and select the "Convert" feature from the interface. Choose the "Video Compressor" option. Press the + icon to add media files or drag and drop videos as you want.

Step 2 Compress Video for Vimeo in 2 Ways
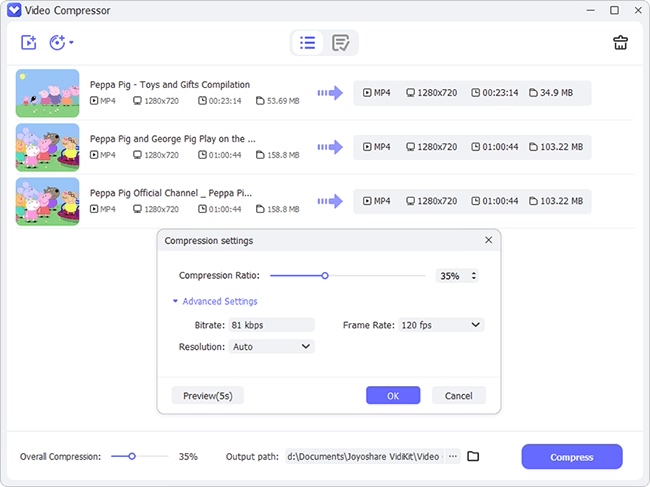
This software will show the duration, resolution, and file size of the added files after you adding your videos. You are able to click the Compress button in the bottom left corner to compress your video by percentage and select batch conversion in a particular percentage value. Alternatively, you can press the gear icon to edit file size manually.

Step 3 Begin the Compression
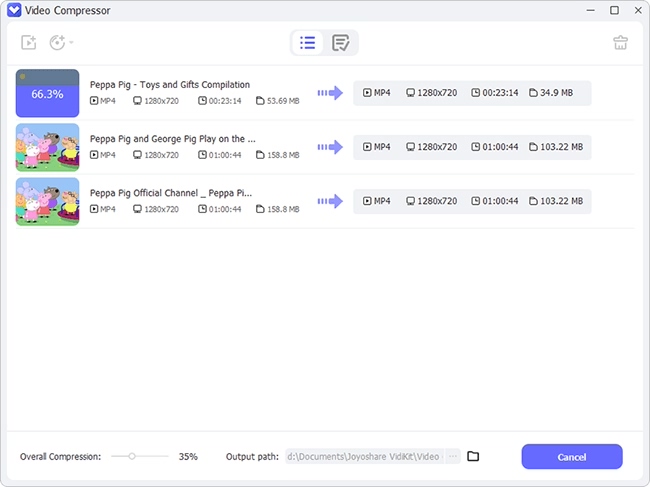
Press the "Output" button to select the location to save the file. Start the procedure by clicking the "Compress" button in the bottom right corner. You can preview your final videos in the History window with its built-in media player.

Part 2. How to Compress Video for Vimeo - Wondershare UniConverter
Whether you have a single file or a batch of files that require conversion, Wondershare UniConverter does everything. The support for a massive format selection makes it an ideal choice, as you can choose any video and convert it into the preferred format. Additionally, you can use the built-in editor to apply filters and advanced features to enhance the video before compressing it for Vimeo. Thus, this converter simplifies the workflow and prepares the file for smooth uploading irrespective of the social sharing website.
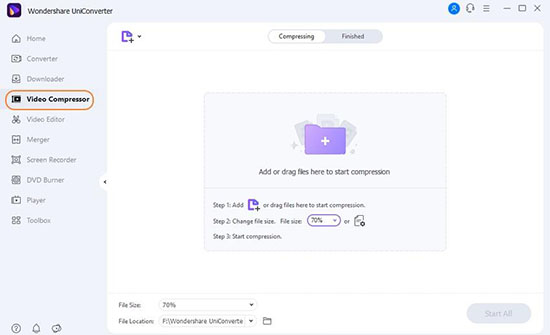
Step 1: Start this software on your computer and select Video Compressor.
Step 2: Click the "+" sign to add video files. You can select a single file or the entire folder.
Step 3: The files will appear along with thumbnails. Click the "Settings" icon to open the window where you can make changes. For example, you can set the quality, file size, constant bitrate, and resolution. Click "Ok" to confirm.
Step 4: Select the "File Location" to choose the location to save the file and press the "Compress" button. Finally, you can check the history by clicking the "Finished" tab from the software.
Part 3. Compress a Video File for Vimeo - MacX Video Converter Pro
MacX Video Converter Pro is a single platform that you can use to convert and compress videos. Along with the compression, you can perform several tasks such as screen recording, editing, and downloading from different sites. As it supports over 420 formats, you can quickly select one and complete the compression with ease. Its features include conversion at 5X speeds, support to all the latest video formats, compression of videos without losing quality, downloading files from streaming websites, video editing capability, and video capturing.
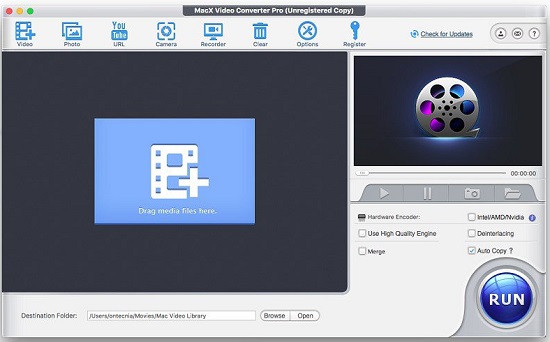
Step 1: Download and install the software.
Step 2: Click the "Video" button to enter the compression window.
Step 3: Load videos by clicking the "+" sign.
Step 4: After completing the scan, a window opens automatically that asks you to choose the parameters. Here, you can make necessary adjustments to ensure a decrease in file size without losing video and audio quality. You can also choose video codec, frame rate, resolution, bit rate, aspect ratio, and channel.
Step 5: Use the crop feature to reduce the size to a degree. Press the "RUN" button to start the compression. Save the file on the computer in the preferred location.
Part 4. Compress a Video for Vimeo - Apeaksoft Video Converter Ultimate
Apeaksoft Video Converter Ultimate is a versatile program that comes to your rescue for compressing videos to minimal size without losing the original video and audio quality. This converter supports over 1000 formats, making it ideal for efficiently compressing a file into the desired output. Additionally, you get editing features such as mirror, clip, merge, crop, filter, watermark, and adding video effects. You also have the chance to create GIFs, edit ID3 tags, and create 3D videos. The support it provides for online videos makes it an eligible program to convert into the required output. Additionally, it quickly opens DVDs and ISO images and lets you use the advanced toolkit that helps you enhance the video.
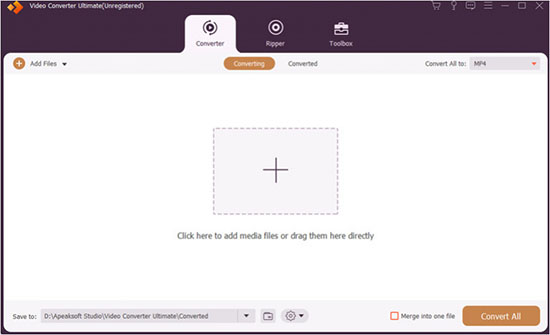
Step 1: Download and install the software.
Step 2: Click Toolbox - Video Compressor. Use the "+" sign button to add a video or an entire folder to the software.
Step 3: In the settings window, alter the name, size, format, resolution, and bitrate. Then, use the preview screen to view the corrected video before saving it into the desired file format.
Step 4: Click the "folder" icon to pick the file destination and press the "Compress" button.
Part 5. Compress a Video File for Vimeo - AnyMP4 Video Converter Ultimate
AnyMP4 Video Converter Ultimate is a single platform from which you can do several video editing and compression operations. For example, you can add video effects according to the requirement and then compress them to upload them to Vimeo. This software supports all the video formats, making it simple to edit videos, add filters and effects, and do much more in a few simple clicks. You can crop, trim, merge, add subtitles, watermark, and use the advanced toolkit to enhance a video.
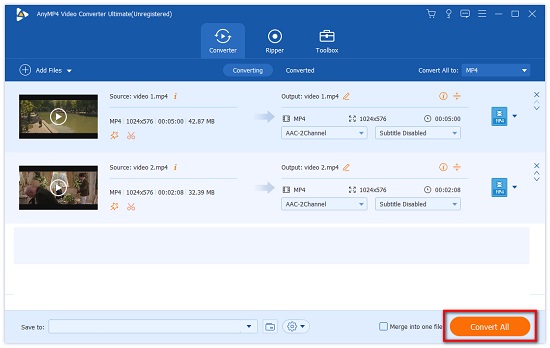
Step 1: Download and install the software. Press Toolbox - Video Compressor. Click the "+" sign from the interface to add videos. You can add a single video or the entire folder.
Step 2: Once the program reads the input file, it will open the settings window. Now, you can make changes to the parameters. You can change the file name, format, resolution, and bitrate to compress the video.
Step 3: You can further use editing tools such as crop and trim to reduce the size further.
Step 4: After completing the settings, click the "folder" symbol to pick the file saving destination. Click the "Compress" button to begin the compression.
Conclusion
Compressing a video requires software that does the task with perfection. Unfortunately, not every tool is capable and will meet the expectations you are looking for when posting high-quality videos on Vimeo in reduced file size. Fortunately, Joyoshare VidiKit is allowing you to compress video for Vimeo without losing the quality. In addition, it has all the features that you need to enhance the output video.
